

Office administrators wear many different hats. They’re responsible for collecting timesheets from members in the field. They process client invoices and reports from team members. In many cases they’re responsible for every document that comes through an office. Traditionally, these tasks have been handled with a time-consuming paper system, but as technology sweeps through every industry, it only makes sense to use software to improve administrative processes.
Office admins can use FieldFocus on their desktop computers to create custom forms – timesheets, inspection reports, checklists, etc – and then assign them to team members in the field. A one-page company report takes only 5-10 minutes to create from scratch, and then it’s hands off – everything is stored online. After the field staff submits their reports, office admins can store them, use them for management reporting, or email them to clients. What used to take hours with a pen and paper now takes just minutes. By providing real-time data collection and instant report submission, FieldFocus helps field workers and admins in every industry reclaim valuable time.
The following screenshots show just how easy it is to create a custom form:
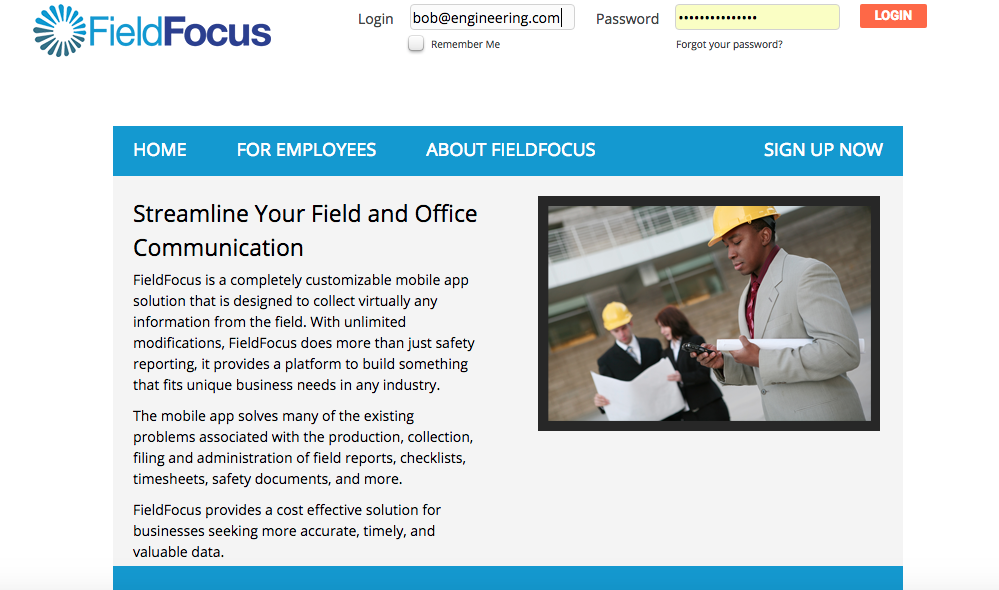
Step 1.
Visit app.fieldfocus.com and enter login details.
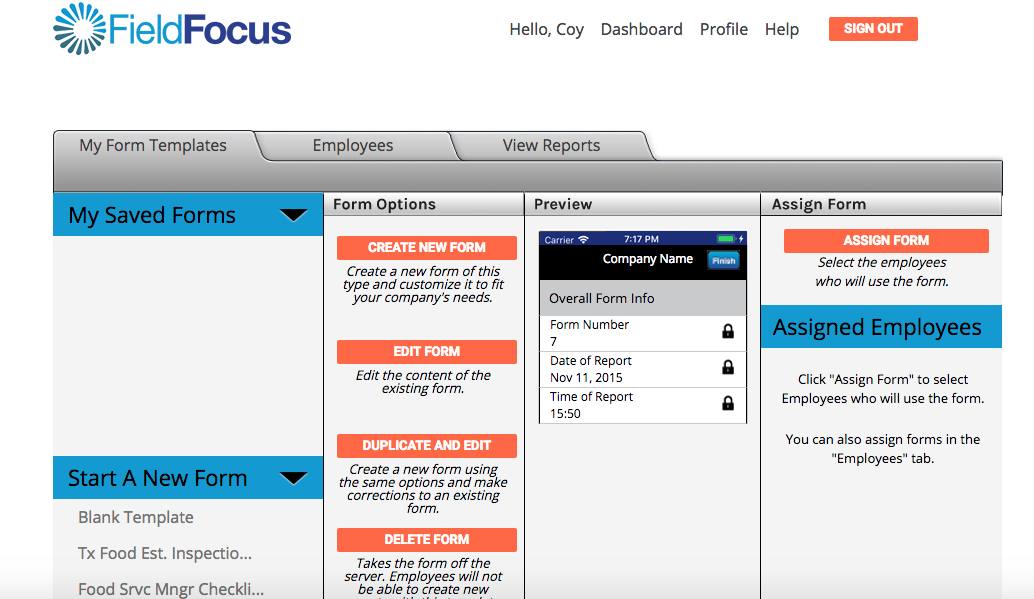
Step 2.
View dashboard and click “CREATE NEW FORM” in the orange box in the Form Options column.
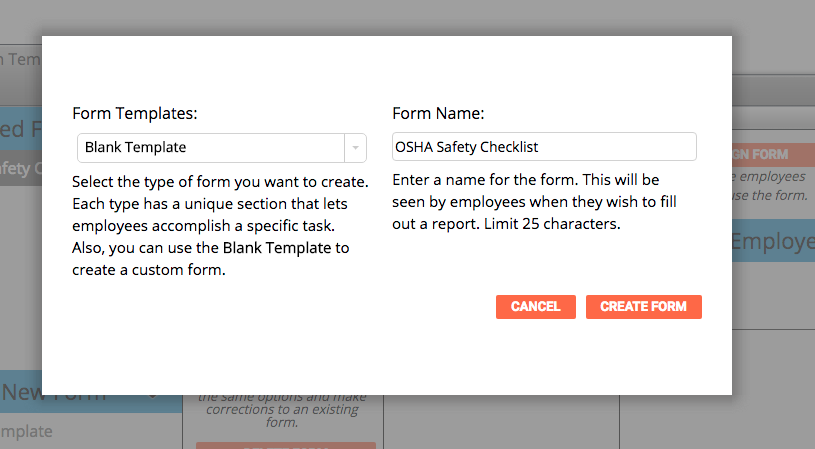
Step 3.
Select form type from existing templates, or create a form from scratch. Give the form a name and click “Create Form.” In this example, we’re creating an OSHA Safety Checklist. After entering the new form name, click “CREATE FORM.”
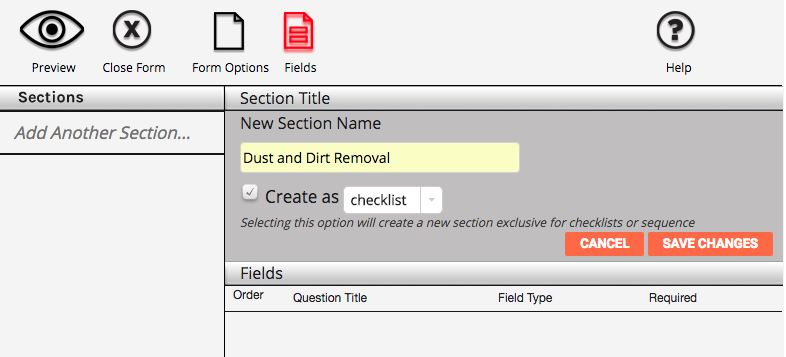
Step 4.
Now we’re on the question-building page for the new form. Click Add Another Section from the left-hand column to add a section to the form. A box will pop open to fill in details about the new section. In this example, we’re creating a Dust and Dirt Removal section.

Type in the New Section Name and click “SAVE CHANGES.”
Step 5.
With the new section added, it’s time to start adding questions to the section. With the newly created Section selected in the left-hand column, click the orange “Add Another Question…” text in the center field.

A box will open with blank fields for entering question details. Here’s an example of Yes/No question for our OSHA Checklist in the Dirt and Dust Section:

Step 6.
After you’ve added all the form sections and questions, click Preview to see how the new form will look on a mobile device.

Step 7.
If you need to continue editing the form, click “Fields” icon just above the preview screen. If you’re done with your form, click “Close Form” to return to the main dashboard. You should now see your new form in the left column titled, “My Saved Forms.”

Step 8.
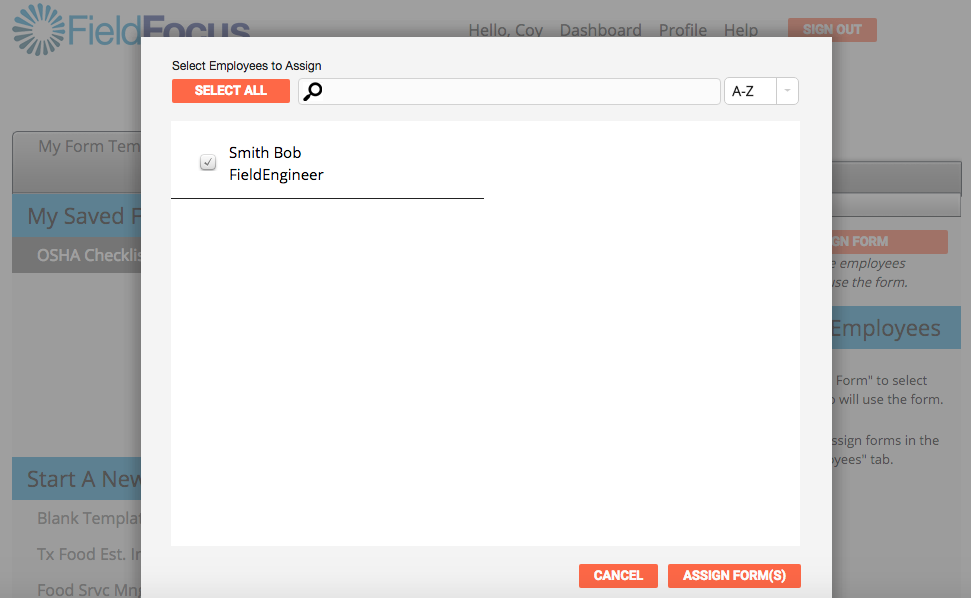
With the new form selected in grey, you can now assign the form to employees. Click the orange box on the right side with “Assign Form.” A box will pop open with your employees. Find the employee and click the circle to the left of their name and then click “ASSIGN FORM(S)” at the bottom.
Step 9.
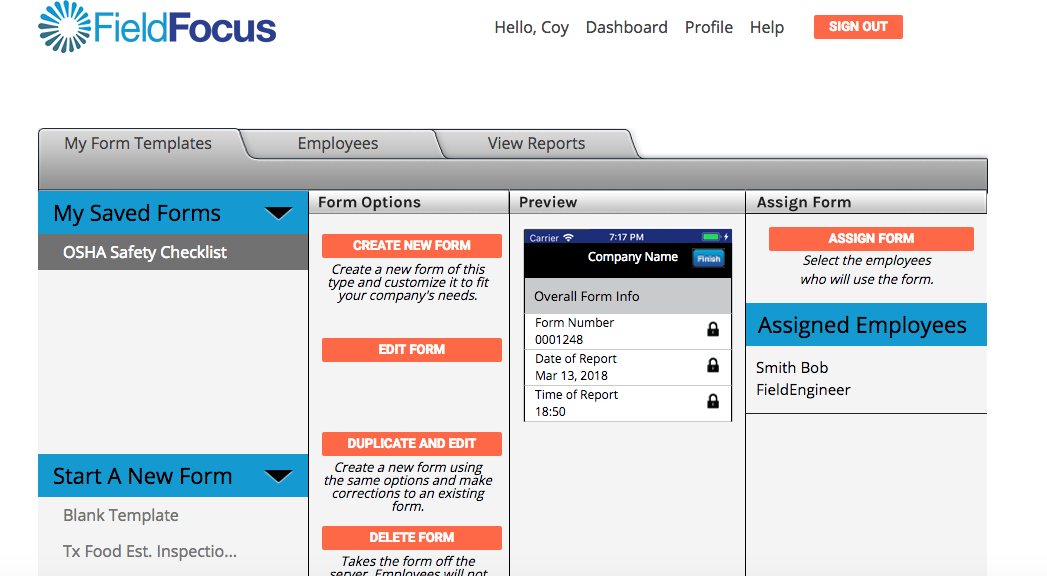
Back on the main dashboard, you can confirm that the employees were assigned the correct form. In the example below, you’ll see that “Bob Smith” was assigned the OSHA Checklist and it shows up next to his name.

Step 10.
That’s it! You’ve created your first form and assigned it to your team member. You can now use Form Options on the main dashboard to View, Duplicate and Edit or Delete your Saved Forms.
Are you ready to start creating custom forms? Or, are you already a FieldFocus user and have a question? Either way, give us a call today and we’d be happy to help you.